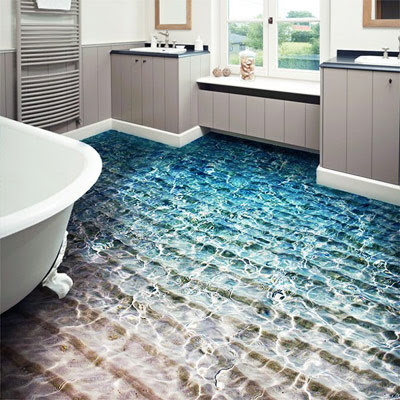
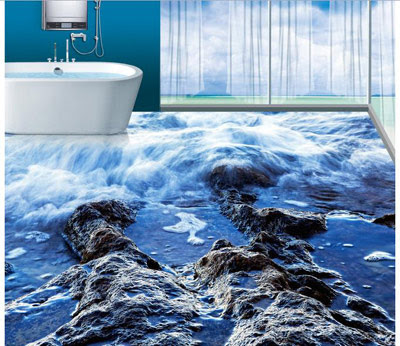
Step by step to make 3d floor art DIY in your home, and 3d bathroom floor with stylish murals, 3d floors painting for modern home decor, 3d epoxy flooring, 3d flooring, 3d floor designs
After we mastered the ceiling, it's time to go down to the ground and take care of the arrangement of the floors. Perhaps you have seen the views of street artists who paint amazingly realistic pictures on the pavement, causing passers-by in horror to rush away from the gap gaping underfoot or to stop in admiration at the sight of the volcano crater that appeared right in the middle of the street. This magic is quite within your power. So, as you probably already guessed, today we will do 3D floors with our own hands.
What is 3d floor - 3d epoxy flooring?
But today we say boldly. Because to get 3d flooring high-quality, we first need a perfectly flat surface, which can take up to 28 days to manufacture. I explain: the 3D floor is a very thin (up to 3mm) layer of transparent polymer with a pattern inside it, deposited on a fabric or on a film.
With such a thickness of the filling layer, any unevenness will make the process of obtaining the 3d floor art impossible. Imagine that you will have sites that stick to the same three millimeters ... You will not feel this 3D floor anymore with your eyes, but with your feet ... Therefore, it is better not to remember the perfectly flat surface about the technology of liquid floors.
3d floors - what materials to use
Filling 3D floors - not yet the most common type of coverage. As a rule, they are dealt with by specialized firms that have all the necessary materials and tools.
Be prepared for the fact that all the material you need will have to be ordered and for this reason, it is necessary to carefully calculate the entire volume of the forthcoming works and not to be mistaken with the number and composition of the components.
If the usual primer you can buy in any store, then, for example, with a solvent of 646 such a number will not pass.
What we need to make a 3d flooring with our own :
- Component-based of a polymeric floor at the rate of approximately 4kg per 1 sq.m. surface. Depending on the selected component and fillers, the flow rate may be different.
- Hardener in the correct proportion of the selected substrate. And suitable for it.
- A solvent suitable for the selected polymer type.
- The drawing itself. We'll have to look for a printing house capable of making a design print on vinyl film or on fabric by thermal transfer on the right scale.
As you can see, the task is not trivial. But we are not looking for easy ways
Screed for 3d floors and 3d floor art
For the primary leveling of slabs, a screed manufactured in a classical way using a cement-sand sweep is universally applied. Due to the properties of the material, such a screed should dry at a rate of 1 centimeter per 1 week of the layer. Since the usual thickness of the screen - about 4 cm, then the output we get the desired 28 days.
But instead of such a screed, dry mixes made by the factory method are becoming more and more popular lately, and they allow considerably speeding up the drying process and improving the quality of the layer. In any construction shop, you will be offered a whole set of such mixtures from different manufacturers.
The screen is too coarse and unsuitable for 3D floors. The primary base layer must be leveled with a final leveler on a cement basis. These are well-known "self-leveling" floors.
What will happen if you pour water on an uneven surface? It will be evenly distributed in a perfectly flat horizon - a property of a fluid known since ancient times.
This is how the finishing leveler works - it spreads evenly across all irregularities and after drying we have an even and smooth surface without bumps and hollows. And this is exactly what we need.
Surface preparation for 3d floors
Before the start of the preparatory work, the last layer on the surface of the rough floor must completely dry. The time required for drying is indicated on the package by the manufacturer of the mixture.
Now the surface must be slightly roughened to ensure adhesion to the polymer layer. For this, a Bulgarian with a special nozzle is used.
As a result of stripping, a large amount of fine cement dust is formed, which must be carefully collected by a vacuum cleaner. The usual household vacuum cleaner does not dance for such purposes - its filters will choke from cement dust at a time.
And the two vacuum cleaners will have to be thrown out. There are special building vacuum cleaners, quite affordable, which can either be purchased or rented.
The dusty surface is primed with a mixture of a polymeric material of a floor with a solvent in a certain proportion. The primer should dry completely after application.
Step by step to make 3d floors by own hands
We glue our picture on the 3d flooring with a transparent polymer - a component of the floor. Carefully level the fabric or film to exclude any kind of jam or wave.
Mix the floor component with the hardener in the correct proportion and pour it onto the 3d floor art over the pasted pattern. Using a wide spatula, the mixture is evenly distributed over the entire surface and rolled with a needle roller to remove air bubbles.
Despite the fact that it is a liquid, its fluidity is not sufficient for rapid and independent spreading. Therefore, a compulsory distribution is required first. Time is running out - after 40 minutes the solution starts to harden and you have to pour it out and roll it with a roller.
The process is furnished with a whole host of nuances and limitations:
The mixture must be prepared or immediately in full for the entire room (and this will require a suitable large capacity), or work as a team: two pour and equalize, the third prepare the next batch.
To mix the mixture you will need a building mixer or a perforator in the unstressed mode with a nozzle for viscous liquids.
To get to all corners of the room on the spilled floor, you will need shoes with spikes. Otherwise, as a designer print, the sole of your shoes will forever be imprinted. No such shoes? Do yourself: in the punch of plywood screw up a dozen screws and sticky tape to your shoes. 40 minutes is enough.
Rubber gloves are always on hand.
All work should be done at room temperature.
You can see more 3d floors in this video
you should see: All Secrets on 3D Epoxy Flooring and 3D Floor Art Designs
Done! We wait about 48 hours to dry completely and admire the result. Perhaps, one more step is required, which is mandatory for some types of polymer - finish polishing and varnishing.


